Frozen Sour Grapes: A Cool Flashback with a Tart Twist (July 2025)
Jadrian Johnson, UC Master Food Preserver Online Program Volunteer
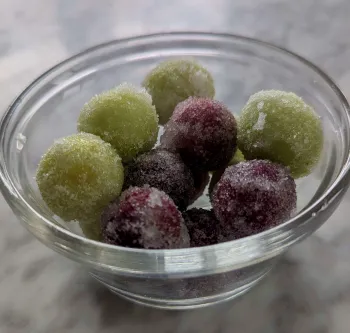
Image credit: Jadrian Johnson, 2025
If your childhood tasted like Atomic Warheads and early-generation Sour Patch Kids, you already know the joy of a good sour pucker. This recipe for frozen sour grapes brings that same zingy magic, only this time, it’s wrapped in a fresh, frosty snack that’s as fun to make as it is to eat.
At its core, the recipe is disarmingly simple: fresh grapes, lemon juice, and a sour-sugar coating made from pantry staples.
Roll your grapes (green for a snappier sour pop, red for a sweeter contrast) through the lemon juice, then into the sour sugar mix. Spread them out on a tray and freeze until firm. That’s it.
The key to the best results? Use plump, ripe, fresh grapes, the kind that feel like little water balloons about to burst. Older grapes tend to shrivel in the cold, so start with fruit that’s still crisp and full of juice.
And here's where the sour magic happens: you’ll mix 3/4 cup of sugar with 7 1/2 teaspoons of food-grade citric acid (and really mix it well). You want that tartness evenly dispersed throughout the sugar, not lurking in one spot like a landmine.
I love how accessible and economical this recipe is. Grapes are easy to find and often affordable, and everything else you probably already have in the cupboard. There’s no need for canning equipment, pH testing, or heat; just a freezer and a bit of childlike play.
Speaking of play, this is a recipe that begs for little helpers. Kids can get their hands (and probably noses) into every step of the process, and they’ll feel a sense of ownership when they pop that first frosty sour grape in their mouth. Adults, be warned; you may find yourself elbowing the kids out of the way for seconds.
Freezing, after all, is one of the most reliable and beginner friendly methods of preservation we have. By quickly lowering the temperature, we’re halting microbial activity and enzymatic changes that would otherwise lead to spoilage. There’s no special equipment needed, just a freezer and a little bit of space. For anyone new to food preservation, it’s an empowering place to start: low risk, low cost, and (in this case) high reward.
Photos from my own batch are included, but trust me, this one’s better experienced than read about.
Go on. Freeze a little fun.
How to Make Frozen Sour Grapes
A delightfully tart and chilly treat
You’ll need:
- 4 cups fresh green or red grapes, plucked from stems and rinsed
- Juice of 2 lemons
- 3/4 cup granulated sugar
- 7 1/2 teaspoons food-grade citric acid
Steps:
- Prep your sour sugar: In a small bowl, combine the sugar and citric acid. Stir thoroughly to ensure an even mix.
- Rinse grapes: Make sure your grapes are clean and plump. Do not wash with detergents.
- Toss grapes in lemon juice: In a large bowl, drizzle the grapes with fresh lemon juice. Stir gently to coat.
- Roll in sour sugar: Working in batches, roll the lemony grapes in the sour sugar until fully coated. If your sour sugar becomes too damp, with a texture of wet sand, mix another batch using the same ratios (about 2 ½ teaspoons citric acid to ¼ cup sugar). Wet sugar will have trouble adhering fully to the grapes.
- Freeze: Spread grapes in a single layer on a parchment-lined baking sheet. Freeze until firm, about 4 hours.
- Store: Transfer grapes to a freezer-safe airtight container such as a freezer bag or jar.
- Enjoy: Serve straight from the freezer. Store leftovers in a freezer-safe, sealed container for up to 6 months.
Tips:
- Green grapes give a sharper sour punch; red grapes offer a sweet-tart balance.
- Let kids help with rolling and mixing. It’s sticky, sensory fun.
- Try other citrus juices or flavored sugars for custom versions.
- Adjust the tartness by reducing or increasing the citric acid, between 1 and 3 teaspoons per ¼ cup sugar.