Growing, Harvesting, and Curing Gourds for Craft Projects
Growing ornamental gourds to be used for crafting is a long-term project, sometimes lasting up to a year, but is an easy, fun, and rewarding endeavor that both young and mature gardeners can thoroughly enjoy. Lagenaria siceraria is commonly known by many names, you will find it labeled as Calabash, Bottle Gourd, New Guinea Bean, Birdhouse Gourd, and more. They come in many shapes, including the classic gourd shape and long and skinny. I've grown the small, medium, and giant varieties of the classically shaped type, those are what are in the pictures.
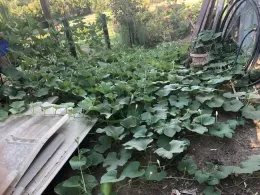
The gourd plants are vines that prefer well-drained, nutrient-rich, moist soil and a long growing season. They take up a lot of space but take to trellising well if ground space is limited. The plants are fast-growing, with the first gourds appearing in a matter of weeks. The young gourds are edible if harvested young, but they are usually grown for ornamental purposes and left to mature on the vine. Once the outer shell has hardened completely, it may be harvested to cure. If you leave at least a few inches of the vine attached, you will have a convenient handle and expedite the curing process as the leftover stem will act as a wick to draw moisture away from the fruit itself. If you choose to grow gourds of different sizes make sure to plant them far apart from one another as cross-pollination can happen.
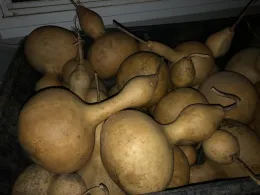
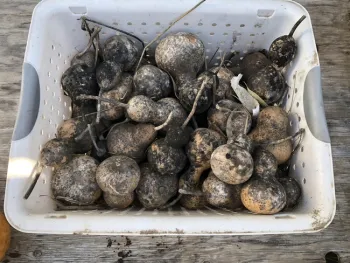
Once you have picked the gourds you are ready to start the curing process. Store the gourds that you would like to cure up off the ground in a well-ventilated area, they do not require much care besides the occasional turning. They may be stored inside, outside, under the eaves or under a potting shelf, protection from the wettest weather is all they need, time does most of the work. I store mine in a radio flyer wagon in a lean-to against our garage. This makes them easily moved when they need to be. The gourds will form a patina on them that might look off-putting, but it is simply part of the curing process and will be cleaned off later. Heat, wind, and low humidity will speed the curing process and under ideal conditions will speed the process up to around six months, but a full year is often needed. How do you know when the gourds are fully cured and ready to be painted etc.? You simply shake them. When they sound hollow and rattle like a baby rattle, they are ready to be cleaned.
The gourds are cleaned by thoroughly scrubbing with a fine-grit steel wool pad and lots and lots of water...you will get wet in the process; kids love to do this portion. You may use up to a 10 percent bleach solution during this step, but I prefer not to and have not found it necessary, especially with young children helping with this portion of the project. It may take a few scrubbing sessions to get the gourds perfectly pristine, it simply depends on the project's needs how clean you want them to be, example a birdhouse you will be hanging outside does not need to be spic and span, but a gourd to be painted might need to be. Before the gourds are drilled or painted, they will need to be thoroughly dried, possibly overnight.
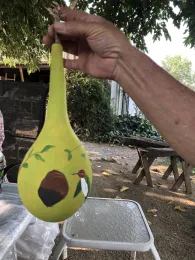
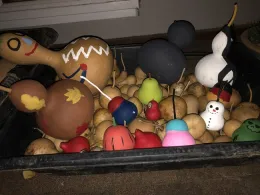
Now that the gourds are cured, cleaned, and dried they are ready to be used. Most any paint will work on the gourds, plain tempura is great for kids to use, but for serious artists, which I am not, acrylics seem to work the best. A clear transparent topcoat varnish may be used over dried paint, marker, glitter, etc. if you would like the art to last for many years. The cured gourds are hard so a drill will need to be used to create any holes like you would need if you were creating a birdhouse. Because gourd growing for projects is such a long endeavor, I usually have at least a few gourds in each of the stages of the process, some growing, some curing and some sitting ready to become art. Here are a few pictures are taken by me from the last few years' worth of gourds.